We’ve seen how choosing the right RV battery chemistry, paired with proper inverter sizing and disciplined wiring, underpins safety and reliability. We’ll compare LiFePO4 for longevity and stability against high-energy NMC when a robust BMS is available, and we’ll prioritize pure sine wave inverters with correct gauge wiring and near-battery fusing. Grounding, isolation, and charge sourcing from shore, generator, or solar all matter. There’s more to standard practices and failure modes we should examine before moving forward.
Key Takeaways
- Choose an appropriately sized pure sine inverter to handle sensitive electronics and startup surges; ensure continuous and peak wattage match your loads.
- Size lithium battery capacity (LiFePO4 or NMC) based on continuous and surge loads, plus a safety margin for autonomy and solar charging.
- Use proper gauge wiring, close-in fusing at the battery positive, and secure terminations to minimize voltage drop and overheating.
- Implement robust grounding, isolated DC/AC grounds, and protective bonding to chassis with documented pathways and torque checks.
- Integrate shore/generator/solar charging with sequencing, monitoring, and alarms for temperature, SOC, and pack voltage to prevent overdischarge.
Choose the Right RV Battery Chemistry
Choosing the right RV battery chemistry depends on how you’ll use the system, how often you’ll recharge, and your tolerance for weight and cost. We evaluate chemistries by energy density, cycle life, safety margins, thermal behavior, and maintenance needs. Lithium iron phosphate (LiFePO4) offers long cycle life, stable discharge, and safer thermal characteristics, yet comes at higher upfront cost and specific handling. Lithium nickel manganese cobalt (NMC) balances energy density and cost but demands robust BMS integration and thermal management. Lead-acid remains budget-friendly with lower chemistry risk but heavier weight and shorter cycles. We prioritize weight considerations for payload efficiency and solar charging alignment, ensuring venting, temperature control, and proper isolation. Budget constraints drive component selection, sizing, and protective disconnects to maintain safe, reliable operation.
Inverter Options for RVs: Pure Sine vs Modified Sine
Are pure sine and modified sine inverters fundamentally different in how they power RV loads, and why does that distinction matter for reliability and safety? We answer with a clear technical lens: Pure sine inverters produce a smooth, true AC waveform that closely matches utility power, supporting sensitive electronics and motor loads with stable voltages. Modified sine units deliver a stepped waveform, which can cause hum, heat, or erratic behavior in some devices. We weigh inverter types by load profiles, startup surges, and long-term reliability. Efficiency concerns arise when converting DC to AC; pure sine units typically achieve higher efficiency under heavy or dynamic loads, reducing battery drain and heat generation. For safety, select models with proper isolation, overcurrent protection, and temperature monitoring. This guidance targets compatible, known RV loads and charging strategies.
Size Your RV System: Calculate Real-World Loads
We’ll start by taking a real-world inventory of everything that actually runs off the RV power system, then translate those demands into continuous and surge loads. Our Load Calculations focus on both nominal running power and startup surges to prevent under- or over-sizing. We categorize circuits by criticality, noting HVAC, refrigeration, lighting, water pump, and electronics loads, plus charger and inverter overhead. We map each item’s runtime, duty cycle, and voltage, converting to watts and amp-hours. We then sum continuous loads, add surge factors, and apply a conservative safety margin to determine minimum inverter wattage and battery capacity. This disciplined sizing avoids nuisance trips and ensures peak performance during boondocking. Informed choices minimize risk and align system architecture with actual RV usage.
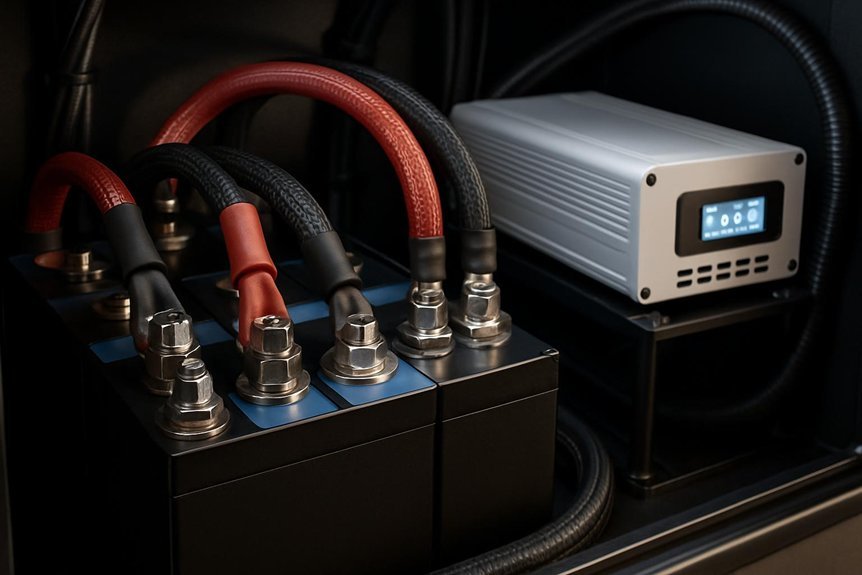
Wire the Battery to the Inverter Safely
We’ll outline the core steps for wiring the battery to the inverter with emphasis on Proper Cable Sizing, Proper Fuse Placement, and Grounding and Bonding Steps. We’ll specify conductor gauges and current ratings to match inverter input, install a appropriately rated fast-acting fuse, and establish solid grounding and bonding per code. We’ll also call out best practices to minimize voltage drop, ensure secure terminations, and verify isolation before operation.
Proper Cable Sizing
Ensuring the correct cable sizing is essential for safe, efficient operation when wiring the battery to the inverter. We approach sizing with concrete calculations: determine max current, allowable voltage drop, and temperature rating of the chosen cable gauge. Inverter current draw plus peak startup surge defines continuous ampacity, not just nominal rating, so we select a gauge that exceeds the highest expected load. Consider run length and ambient temperature; longer runs increase voltage drop, reducing available battery voltage at the inverter. Use a conservative voltage drop target, commonly 2–3% for 12–24V systems, adjusting for higher-lamp or motor loads. Verify insulation, terminal ferrules, and lug sizes meet manufacturer specs. Document wire type, gauge, and routing to ensure repeatable, safe maintenance with proper cable gauge and voltage drop considerations.
Proper Fuse Placement
Have you verified the fuse location and rating before connecting the battery to the inverter? We approach fuse placement with precision, ensuring the DC bus is protected and wiring safety is maintained. For correct sizing, use a fuse rated near the inverter’s maximum input current and place it within close proximity to the battery positive terminal. Route cables away from heat sources and sharp edges, securing with appropriate clamps. Use one fuse per conductor and label the circuits clearly to avoid accidental disconnections.
| Topic | Guidance |
|---|---|
| Placement | Close to battery, readable labels |
| Rating | Matches inverter max input current |
| Safety | Inspect insulation, secure routing |
This method preserves continuity, reduces arc risk, and supports reliable operation.
Grounding and Bonding Steps
To ground and bond the system correctly, we’ll establish a solid earth reference and bond all metallic chassis points to a single, low-impedance path back to the battery negative and/or chassis, as specified by the inverter manufacturer. We approach grounding basics with a clear, code-conscious method, ensuring a dedicated grounding conductor size that matches the system’s fault current. Connect the inverter’s ground terminal to the chassis and to the battery pack’s negative bus per manufacturer guidance. Use ring or crimped lugs, torque to spec, and avoid shared GI/AC ground loops. Bonding practices require all metal surfaces, enclosures, and mounting hardware tied to the same point. Verify continuity and insulation, then test under load before operation. Maintain documentation for future maintenance and inspections.
Charge RV Power: Shore, Generator, and Solar
We’ll outline shore power management and battery charging modes to ensure safe, efficient input from shore, generator, and solar sources. We’ll discuss proper voltage, amperage limits, and sequencing to prevent overcurrent or backfeed into the RV system. Our goal is clear, precise guidance that keeps lithium packs protected while maintaining reliable power availability.
Shore Power Management
Shore power management ensures safe, reliable RV operation by coordinating the shift between shore power, onboard generation, and solar input. We monitor grid voltage, synchronize frequency, and prevent backfeed while favoring stable sources to protect battery safety and system integrity. Our approach uses automatic transfer logic, measured ramping, and precise voltage regulation to avoid overvoltage or undercharge conditions that harm Li-ion packs. We also implement protective interlocks and warnings for high current draw, loose connections, and thermal risk, guaranteeing operator awareness. The goal is seamless transitions with minimal startup surges, preserving inverter efficiency and battery longevity.
| Source Priority | Monitoring Metrics |
|---|---|
| Shore vs Generator | Voltage, current, temperature |
| Solar input | MPPT voltage, charging rate |
Battery Charging Modes
When charging an RV, we prioritize safe, efficient delivery of power from shore, generator, and solar sources, ensuring the battery pack receives the correct voltage and current without overshoot or thermal risk. Our battery charging strategy selects each source with controlled ramp, monitoring current limits, temperature, and state of charge to prevent imbalance. Shore power engages the RV’s charging controller first, maintaining absorption voltage while limiting bulk current. Generator input uses the same controller but adds automatic derating at higher altitudes or elevated ambient temps. Solar charging employs MPPT optimization, prioritizing higher voltage panels and tracking maximum power efficiently. Throughout, we verify inverter wiring integrity, fuse protections, and proper grounding to sustain long-term pack health and safe operation. This approach minimizes thermal stress and maximizes cycle life.
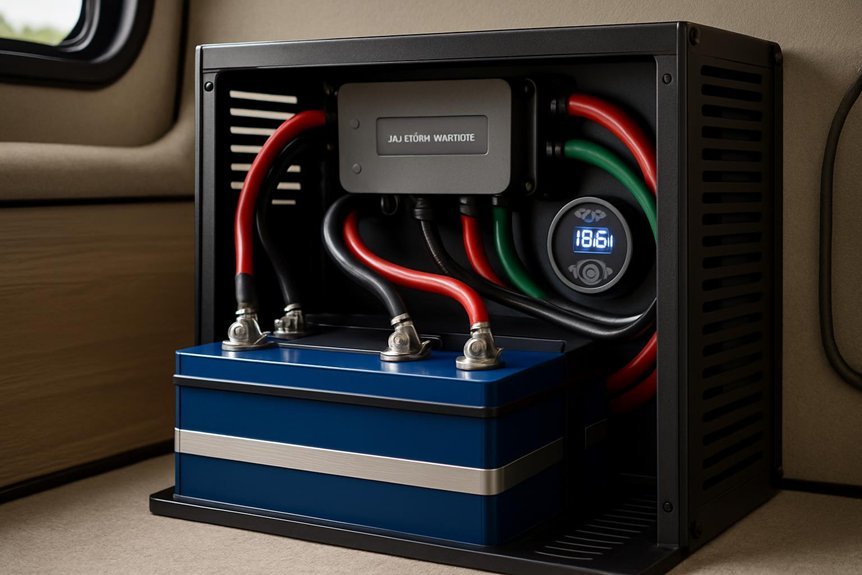
Monitor and Protect Your Battery System
To guarantee long-term reliability and safe operation, we’ll implement continuous monitoring and robust protection for the battery system. We wire a dedicated monitoring module to track cell temperatures, state of charge, and pack voltage in real time, providing alarms for out-of-range conditions. We set conservative voltage and current thresholds to prevent overdischarge and overcurrent, and we log events for post‑trip analysis. We prioritize battery safety by integrating thermal sensors, fuse protection, and automatic disconnect if a fault persists. We verify proper insulation, shore power coupling, and inverter isolation to minimize noise and leakage. We monitor voltage drop across conductors and connectors to flag resistance losses. Overall, our approach emphasizes proactive alerts, rapid isolation, and secure battery operation under varying RV conditions.
Isolate Grounds and Avoid Ground Faults
We must isolate ground paths to prevent ground faults in our RV lithium setup. By planning dedicated grounding and avoiding shared returns, we minimize stray currents and improve safety. We’ll guide you through criteria, tests, and best practices to maintain a fault-free system.
Isolate Ground Paths
Isolate ground paths to prevent return currents from leaking into other circuits and creating dangerous ground faults. Our approach emphasizes disciplined routing and clear separation between chassis grounds, DC negative conductors, and AC earth bonds. We design wiring schemes that maintain a dedicated equipment ground path with low impedance, minimizing loop areas and potential cross-talk. Ground isolation is achieved through careful use of isolated power supplies, proper enclosure bonding, and separation of control circuits from high-current paths. We verify that grounding conductors terminate only at designated bus bars, without parallel runs that could induce unintended fault currents. This discipline supports fault prevention by reducing leakage paths and ensuring protective devices respond predictably. Precise labeling, torque verification, and periodic inspection sustain reliable, safe operation.
Prevent Ground Faults
Preventing ground faults starts with strict isolation of grounds and careful management of return paths. We, the RV team, outline precise isolation techniques to prevent stray currents from energizing chassis or equipment. First, separate AC and DC grounding schemes, using dedicated bonding conductors and properly rated fusing, to avoid cross-contamination of return paths. Inspect all shore power connections for continuity and insulation integrity, replacing damaged components before runtime. Implement a segmented system where the vehicle chassis remains a reserved reference, with isolated negative and earth paths verified at each junction. Use proper torque on grounding hardware and document pathways for maintenance. This two word discussion ideas: ground fault prevention, isolation techniques, guide safe, predictable operation.
Common Wiring Mistakes and How to Avoid Them
To avoid costly trips to the hardware store, we’ll focus on the wiring mistakes most people make when setting up an RV lithium battery inverter and how to prevent them. Common errors include undersized gauge conductors, loose lugs, and mismatched fuse sizing, all of which impair protection and trigger voltage drops. We prioritize correct gauge for the inverter’s maximum current, tight torque on terminals, and proper protection at the source. Avoid parallel connections that confuse polarity or create imbalanced loads. Use dedicated, correctly rated DC breakers and fuses, and route cables away from heat sources and sharp edges. Adhere to battery safety procedures, maintain clean terminations, and verify charging limits are respected by your inverter’s settings. Meticulous wiring reduces fire risk and preserves system performance.
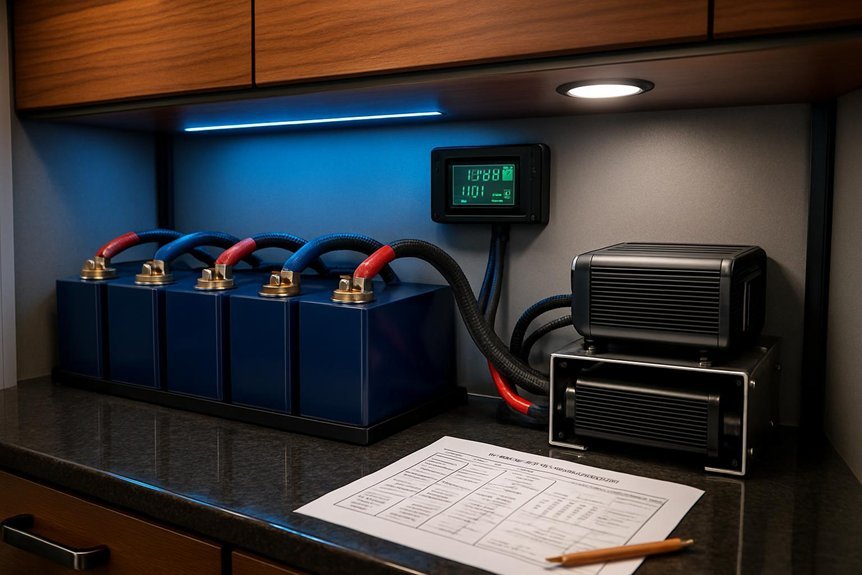
Real-World RV Setups: Case Studies and Takeaways
Real-world RV setups reveal how theory translates into reliable performance, with case studies highlighting the decisions, trade-offs, and guardrails that govern safe lithium battery inverter installations. We present concise examples that stress-tested layouts, wiring hierarchies, and cooling considerations. In practice, idea one focuses on ensuring proper bus sizing, fuse protection, and balanced cell management to prevent voltage sag under peak loads. Idea two emphasizes thorough grounding, sense-line integrity, and transparent data logging for fault diagnosis. We compare off-grid presets, shore power syncing, and inverter/charger coordination to minimize transfer gaps. Across scenarios, we document measurable outcomes: efficiency, thermal margin, and isolation reliability. Our takeaway is disciplined planning, verifiable testing, and conservative margin budgeting to sustain long-term system safety and performance.
Troubleshoot Power Stability Quickly
Ever wonder how quickly you can diagnose a fluctuating RV power bus without tearing into every connection? We approach power stability with a systematic, safety‑first workflow. First, verify battery state of charge and inverter input under load, logging voltage, current, and temperature. If dips occur, isolate the load group and re-test to confirm a failing device rather than a bus issue. Inspect connections at terminals for oxidation, torque compliance, and corrosion barriers, reseating as needed with proper lube and dielectric grease. Check input and output fusing, grounding, and battery isolator integrity, ensuring cables match rated gauge. While troubleshooting, relate chassis practice to asphalt maintenance—seek smooth, documented turns and avoid abrupt transitions. Finally, confirm tire pressure uniformity to prevent rolling impedance shifts that subtly influence electrical loads.
Frequently Asked Questions
How Do I Handle LV Well Under Load on Lithium RV Systems?
We should monitor LV wells by sizing the inverter correctly and ensuring charging efficiency stays high; under load, we upscale inverter sizing to avoid sag, and optimize charging efficiency with proper wire gauge, fusing, and robust BMS integration.
What Safety Gear Is Mandatory During Inverter Installation?
We’ll wear proper personal protective equipment—hard hats, safety glasses, gloves, flame-resistant sleeves, and steel-toed boots—during installation. Safety gear guarantees our installation practices stay precise, controlled, and risk-conscious, protecting you while we handle live components and wiring.
Can I Mix Different Battery Chemistries Safely?
We can’t mix different battery chemistries safely due to incompatibility criteria; we recommend against it. Our safety culture emphasizes strict standards, coordinated testing, and clear specifications to prevent hazards and ensure reliable operation.
How Do Temperature Changes Affect Inverter Performance?
Temperature changes affect inverter performance by altering efficiency and thermal limits; temperature effects can reduce inverter efficiency, increase cooling demands, and risk overheating. We monitor temps, maintain specs, and implement safeguards to preserve reliability and safe operation.
What Are Signs of a Failing BMS in Real Use?
Signs of a failing BMS show in real use battery monitoring quirks: unexpected voltage drops, skewed SOC readings, frequent balancing, and alarms. We’ll flag anomalies, verify readings, and emphasize safety-conscious, precise diagnostics for reliable operation.
Conclusion
We’ve covered how to choose chemistry, size, and wiring with safety as our compass. By pairing LiFePO4 for longevity or confident NMC with a solid BMS, sizing for real loads, and using pure sine inverters with near-battery fusing, we secure reliability. Shore, generator, and solar work in harmony, with solid grounding and grounded fault prevention. Think of the system as a carefully tuned engine—balanced, disciplined, and ready to go, no surprises, just steady power under load.

